Sunday, July 27, 2014

Review: Concrete Minerals

Lately I have been falling in love with loose eye shadow.  Although I find it more difficult to work with, the range of colors and formulas seems endless: a makeup lover's dream!  It allows for truly creative looks.  Couple all of that with skin-loving ingredients and you've got Concrete Minerals.  Founded in 2009, Concrete Minerals boasts a generous line of 56+ eye shadows, both matte and shimmer, and 14 lip tints.  CM is also 100% vegan, cruelty-free, gluten-free, fragrance-free, paraben-free, and made with pure pigments and ingredients without fillers.  

 
The above photo was shot without a flash but under artificial (indoor) lighting.  The swatches were done on dry skin without any primer or moisturizer.  The photo has not been retouched or edited/filtered in an attempt to capture the true colors.  Colors from top to bottom:  Deviant, Storm, Sweet Catrina, Brat, Blood and Guts, Black Metal

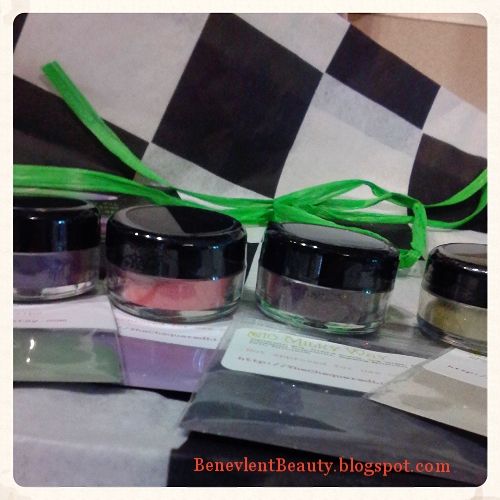
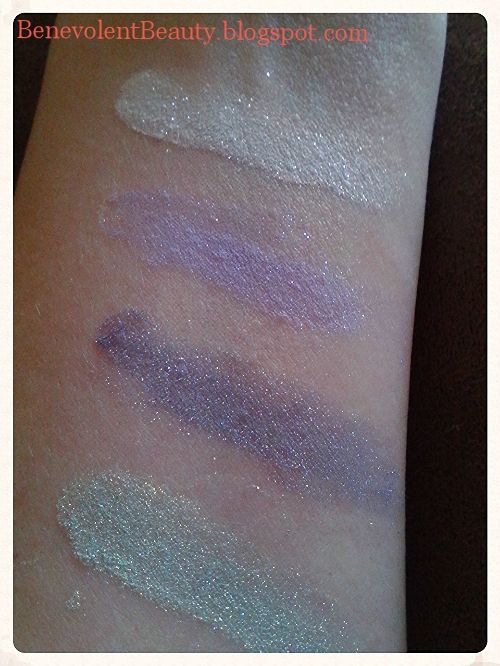
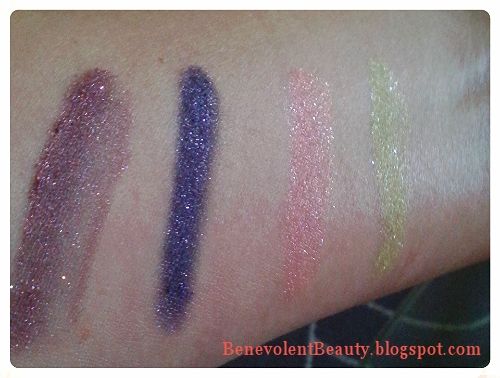
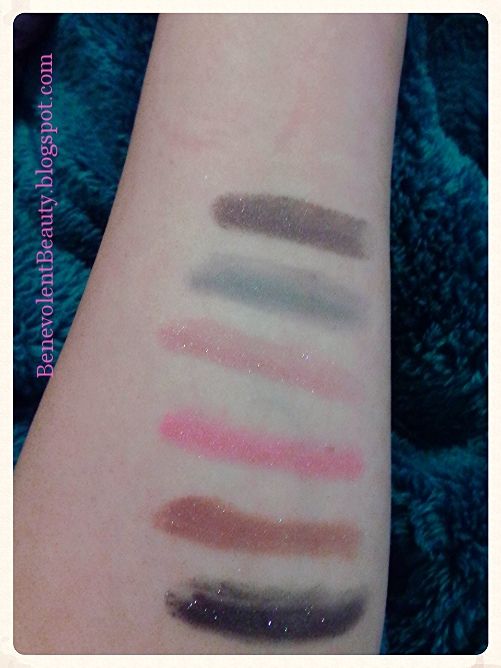
The top two colors (Deviant and Storm) were free samples included with my order of the other four, full-size shades.  Each pot contains approximately 1.5 grams of product.  Deviant and Storm are wonderfully wearable gray tones; Deviant has a shimmer while Storm is a lighter gray matte.  Sweet Catrina, the most flattering shade, is a gorgeous pink champagne color with hints of silver shimmer.  It is wonderful for blending or highlighting.  Brat is a must have for girls who love all things pink and girly: the perfect shade of shimmering magenta!  Blood and Guts is a curious shade of rusty brown with a very faint green shift/shimmer, definitely a conversation starter.  Finally, Black Metal is most accurately named.  It's a deep, dark black with a silver/gun metal shimmer that is ideal as a liner or for a sultry smoky eye. 


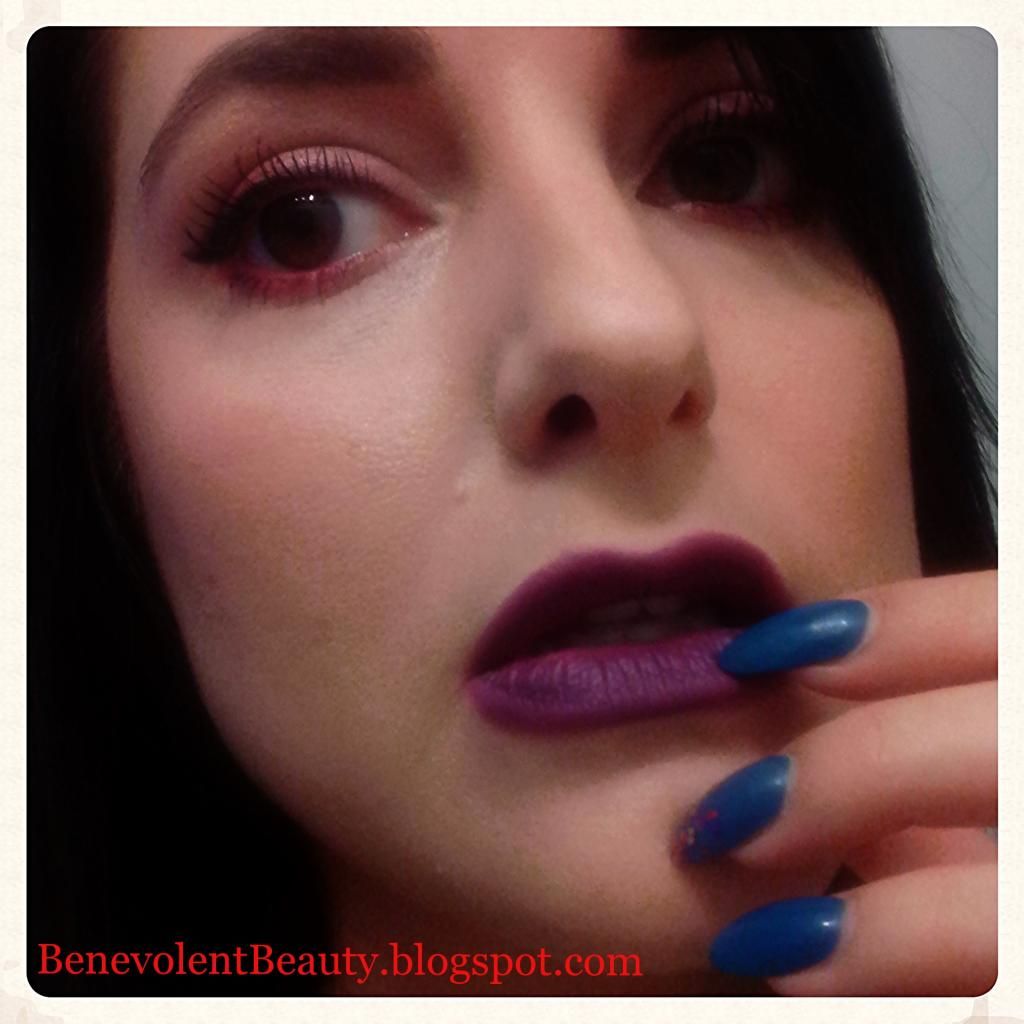
The above photo was taken in artificial (indoor) light, but hasn't been edited/filtered.  I used Brat, blending well, which proves that even a vibrant shade can be totally wearable for day or night.  I smudged Deviant along my lashes as a liner.


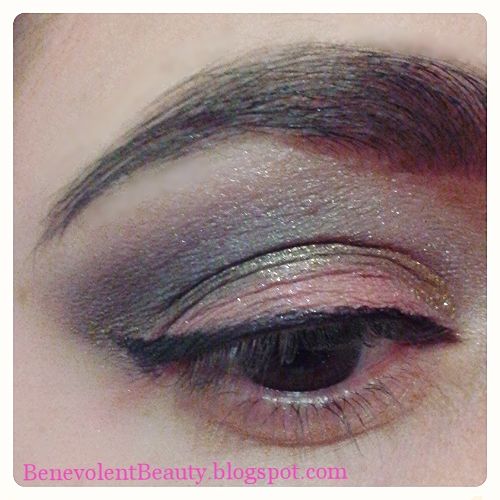
The above photo was taken in artificial (indoor) light, but hasn't been edited/filtered.  For a base shadow along the lid I used Sweet Catrina.  I used Storm for the crease and then topped it with Blood and Guts across the brow bone.  By dipping an eye liner brush in water or primer, Black Metal makes a gorgeous liner!

The Pros:

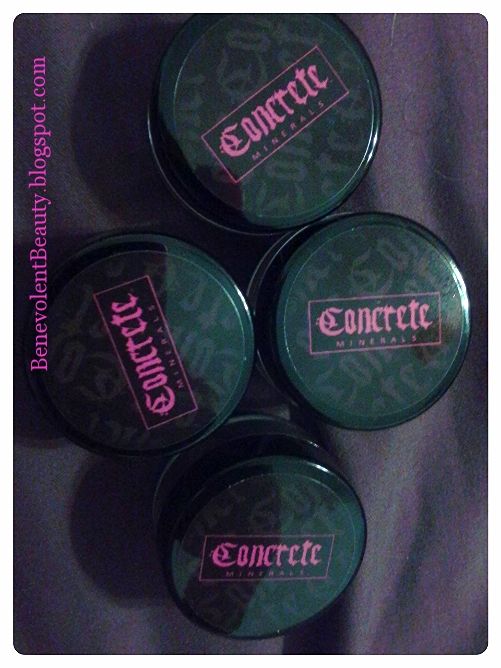
First off, these shadows are a steal for the price, just $7 per full-size pot.  Considering there is no talc or fillers, you're getting true, honest-to-goodness mineral shadows that even sensitive skinned beauties can use.  There are also various promos and coupon codes ongoing that make for an even better value.  If you want to discover a "just right" amount of shimmer, Concrete Minerals is it.  Even the brightest colors are completely flattering and shine in a "grown-up" way.  These shadows are versatile: use them dry as usual, or wet as a liner or for a more vivid look.  Lastly, the packaging is fun!  Their collectible tins will surely appeal to the consumer that craves cute and sexy on the outside.

The Cons:

To be fair, I always try to look at the ups and downs of products; however, it's difficult to complain about such a quality line.  As with any loose shadow, it can be difficult if you're used to pressed eye shadow - there's fall out during application and storage can be an issue.  With a little practice and a big plastic bin to store it all in, you'll easily avoid those minor concerns.

Overall, Concrete Minerals offers a fun and flattering line of products that are perfect for us health conscious consumers that want the total package.

Wednesday, July 9, 2014

Review: The Chequered Lily Apothecary

Handmade cosmetics are a wonderful way to support small business, avoid animal testing and find vegan friendly items.  Finding the cream of the crop can be tricky, but when you stumble upon a hidden gem, you know the search is worthwhile.  The Chequered Lily Apothecary, opened in 2011, offers various cosmetics, though I was focused on their 150+ eye shadow shades in various finishes and textures.  The pastry chef turned cosmetics creator touts cleanliness and ServSafe practices and labels everything to ensure you know what you're getting.


Of the countless shadows, I chose four; I was pleasantly surprised to find four complimentary samples in the pretty Alice in Wonderland-esque packaging.


The above swatches are the sample colors I received.  The picture was taken in natural light without a flash.  I do not Photoshop or filter any of the photos so as to properly represent the colors.  Additionally, these are swatched on bare skin - no primer or lotion.  The colors, from top to bottom:  #12 Snow, Glass, Apples, #64 Hyacinth, #10 Milky Way, #32 Seafoam.  #12 is perfect for a highlighter shade and brightens brow bones or the inner corner of the eyes.  There's a subtle shift in color from silvery white to pale blue and even green.  #64 is a princess perfect pastel purple.  #10 appears deep purple or gray depending on the lighting.  #32 is a surprisingly wearable pastel mint green to gold shift.


The colors I purchased from left to right: #128 Grimoire, #137 Midnight Show, #117 Moving On, #07 Caterpillar.  Each container holds 1 gram of product.  #128 is my favorite of the bunch.  Depending on how it is applied, tapped versus brushed or smudged, it can appear purple, magenta, brown or bronze.  It is gorgeous for a unique, smoky eye look.  #137 is a vivid dark purple, navy blue shift.  #117 cannot be photographed properly; this amazing, peachy gold color is so sparkly and is beautiful as a highlighter on cheekbones.  #07 is a pale gold, yellow, green that makes a fun base shade for any pastel look.

The Pros:

I am always pleased when handmade cosmetics are so meticulously made.  Allergy warnings, ingredients, uses - all labeled clearly.  In addition, vegan and non-vegan products are kept separate to avoid contamination.  The shades are all vivid and highly pigmented, offering great color payoff at just $6.50 per pot.  There are so many colors to choose from, you're bound to find something to your liking.

The Cons:

If you're not a fan of loose shadow and prefer pressed, you won't find it at The Chequered Lily.  The packaging doesn't allow for stacking (e.g. interlocking lids or bottoms) so it'll test your storage space.  The darker shades, namely #128 and #137 can cause a bit of staining on the skin, but are easily removed with makeup remover.

Beautiful, well made and affordable: Take a trip through the looking glass and see what The Chequered Lily Apothecary has for you.

Thursday, July 3, 2014

Review: My Beauty Addiction Cosmetics

I have a tiny obsession with lipstick, stains, glosses, etc.  I find lip cosmetics a simple way to update your look in a flash.  In my never ending search for fun and fabulous lip colors, I am always pleased when I stumble upon cruelty-free brands that offer various formulas and tons of color options.  I was delighted to find 5-year-old handmade brand MBA Cosmetics.  With over 600 items to choose from including eye shadow, body products and, of course, lipsticks galore, I was sold.  Lip sticks and glazes range from $4.75 to $7.50 - how affordable!  Not to mention bundle specials (5 for $20 on Sugar Babies? Yes, please!).

As pictured above, I purchased the Whipped Soap Souffle in "Hello Sugar," Petite Lip Paint in "Burlesque," and Sugar Babies in "Breathless."  The "Passionfruit" loose shadow was a freebie sample.  The souffle is the consistency of room temperature butter, all creamy and smooth.  The first two ingredients, glycerin and almond oil, are incredibly moisturizing and leave skin feeling soft even without a separate moisturizer.  Delicious!  But onto the cosmetics...


The HD lip paints are described as being the most highly pigmented lipsticks of the bunch.  Velvety smooth and hydrating, they offer superb, opaque coverage with a semi-matte finish.  The photo above is "Burlesque" and was taken in natural light, no flash and no filtering or editing has been done.

The Pros:

This little tube is packed with pigment and feels wonderfully smooth on the lips - no dry out!  I got wonderful coverage from just one coat and didn't feel the need for a lip liner.  There are so many colors to choose from; novelty colors like brilliant green and banana yellow, and nudes and pinks galore.  There are also various forms of the lip paint.  You can purchase the same formula in a tube or in a pot for application with a brush.  Depending on what you choose, prices range from under $5 to $7.50.  For the price, this is a must have.

The Cons:

The main issue for this lipstick is staying power.  Because this is a very hydrating formula, you may not get the longest lasting wear without a lip primer.  If cutesy packaging is a must for you, this very functional brand may not initially catch your eye - however, it appears from some of the photos on the seller's site that the packaging may be getting an upgrade to sleeker black tubes.


The aptly named Sugar Babies apply like a gloss but deliver the pigmentation of a lipstick.  They smell like a sugary vanilla cupcake and offer a shiny, non-sticky finish.  The photo above is "Breathless" and was taken in natural light, no flash and no filtering or editing has been done.  Depending on how the light hits it, it's a dark, stormy gray/blue/purple.

The Pros:

They smell sweet enough to eat and come in an amazing selection of colors.  Given the reasonable price tag, I wanted to try a color I'd never consider otherwise.  This jojoba oil based gloss is not sticky, yet delivers lots of shine.  This formula mixes easily with other lip glosses to boot!  At just $4.75 I could easily see myself stocking up on many of the colors available.  The coverage is quite impressive for a gloss, though not quite what I'd consider a liquid lipstick.

The Cons:

Again, don't let the simple packaging fool you - unless simple packaging just isn't doable for your personal collection.  This particular color, "Breathless," does temporarily stain my lips, but can be wiped away easily with makeup remover or plain old cleanser and water. 

If color and value are important to you, look no further than MBA Cosmetics.  I am quite sure I'll be placing another order in the near future. 

Friday, June 27, 2014

Tutorial: Self-Tanning Fixes 101

Summer is here and I don't have to tell you how important a golden glow can be to your look.  It's slimming, it evens out your skin tone and blurs imperfections, and it makes you look healthy.  Chances are you've already tried self tanning at home, but perhaps your results weren't ideal.  With a few quick fixes to common self tanning woes, you'll get the perfect shade of bronze without the hassle.

Step 1:  Choose the Right Formula 

Whether it is spray or foam, cream or gel, there are many choices on the market.  The best tip for choosing the right one for you?  Don't be cheap.  It's understandable, some of us do beauty on a budget, but a good self tanner will last you for months and is generally the easiest to use.  The formulas are built to reduce streakiness and help you avoid looking orange.  My favorite self tanner is Tarte's Brazilliance (pictured at top).  It is a gel/cream hybrid that is tinted to show you where it's going as it's applied.  The application mitt is particularly helpful: one, you avoid orange palms and stained nails and two, it cuts streaky application down considerably.  This formula also has a beachy coconut fragrance; while that self tanning smell isn't completely gone, it's certainly less noticeable.  

Step 2:  Apply at the Right Time

Some of us apply self tanner and attempt to go about our day:  No.  Stop.  Desist.  Throughout the day you're sweating, producing oil, rubbing against your clothing and other people.  Even though it might seem like your tanner is dry, most formulas are working for hours after they are applied.  To avoid finding splotches or uneven spots, apply your self tanner at night right before you turn in for the night.  We all tend to sweat less when we sleep, and pajamas tend to be less binding than other clothing.  It gives your skin the best opportunity to process with little to no movement going on.

Step 3:  Blend Trouble Spots

Before you apply your self tanner, consider applying a tiny dab of regular lotion to your knees and elbows.  Massage into the skin completely, then apply your tanner.  The lotion will prevent the dry skin on your elbows and knees from turning orange or darker than the rest of your skin.  After you wash your hands post-tanner application, use your damp fingertips to massage around your wrists and along the backs of your hands.  Washing your hands may have spread water droplets around the area, which can become splotches once your tan is complete.  Finally, do the same around your ankles, blending with your fingertips down toward your feet.  You don't want ring-around-the-ankle/wrists, right?  Taking an extra minute or two to blend these areas is key.

Step 4:  Make Corrections

Leave your self tanner in tact for however long it takes to process fully (the product packaging will tell you).  Once your tanning time is complete, take a shower.  Don't use a bath puff or abrasive sponge, just your hands or a soft washcloth.  After you've dried off, take a look in the mirror.  If you have any streaks or splotches, chances are they can be repaired.  For very minor streaks or discolorations, exfoliate the darker area with a loofah or other abrasive sponge.  This should even you out.  For more noticeable splotches, dip a cotton ball in nail polish remover and rub until you notice the color starting to become more even.  As a last resort if you've missed a spot, add a tiny bit of tanner to the bare area and blend VERY well.  

Step 5:  Troubleshooting

Are you noticing your skin looks orange?  Splurge on a cosmetic grade formula (read: probably not for sale at your local drug store/supermarket).  You may also be applying too much or too often.  Let's face it, self tanners can only go so far to give you a bit of color.  Like celebrities that have overdone it, you, too, can over apply at home.  Most self tanners should be applied no more than twice a week to maintain color.  Finding clogged pores or pimples cropping up?  Exfoliate between applications.  Self tanner can settle into your pores and cause bumps.  Scrub trouble spots with a sugar scrub: my favorite is the ridiculously accessible and wonderfully priced Tree Hut Shea Sugar Scrubs.  This particular scrub moisturizes without depositing heavy oils on your skin, so you can apply your self tanner directly after use.  Practice makes perfect, so keep at it and soon you'll be a bronzed goddess without ever leaving your bathroom.

Tuesday, June 24, 2014

Review: Melt Cosmetics

This past spring season I became absolutely infatuated with matte lips.  From lip creams and stains, to opaque lipstick; any color, as long as it was perfectly UN-shiny.  I did plenty of searching, plenty of research, and of the many options out there, I was intrigued by melt cosmetics.  "Ultra-matte.  Bold.  Radioactive."  It sounded like the perfect motto for a cosmetics brand.  As if that weren't enough, all of their lipsticks are vegan, cruelty-free, gluten free and paraben free.  Melt offers twelve unique shades from pinks that would make Barbie envious, to a curious shade of slate gray - all matte, all gorgeous.

I purchased two of the company's twelve shades to try when they were offering a free-shipping promo: Summer! - a soft, creamsicle orange, and By Starlight - a deep, dark true purple. 

Above:  Summer! The photo is not retouched or filtered, and it was taken in natural light - no flash.  I did not use any primer or lip liner.

Above:  By Starlight. The photo is not retouched or filtered, and it was taken in natural light - no flash.  I did not use any primer or lip liner.

The Pros:

If you are looking for creamy, super opaque lipstick, you want Melt.  The shades cover completely and offer rich, deep pigments.  Melt does not offer lip liners at this time, but I didn't find myself needing a liner.  I had no bleeding or feathering around my lips - this stuff REALLY stayed in place, particularly By Starlight.  Both lipsticks applied beautifully right out of the tube so reapplication (although rarely necessary) was a cinch.  Some smaller retailers don't offer refunds, but Melt has a fine policy on returns.  I didn't need to use it, but it is nice to know it's available.

The Cons:

Melt only offers lipsticks, twelve shades in total.  If you are a fan of lip gloss, or are seeking a different formula, you won't find it.  They do one thing, but they do it well.  Depending on your budget, $19 per lipstick can be pricey; I'd love to see them offer more promotions and sales in order to attract new buyers (or those wanting to stock up, like me...).  Finally, popular shades sell out... FAST.  The only way to determine when colors will be restocked is to sign up for Melt's mailing list and wait. 

Application Tips:

As with all matte lipsticks, you don't have the benefit of shimmery pigments and an oily, glossy texture to help even things out.  Before you apply, exfoliate your lips.  I use a warm, damp washcloth and rub in a circular motion until smooth.  You may also want to look into a good primer if you find flakiness or dryness a problem.  Lastly, these shades allow for excellent blending so you can create custom colors.  Too fun!

Friday, June 20, 2014

FYI: 5 Common Animal By-Products You Didn't Know Were There

So, you're doing your part and checking your companies out to be sure you're buying cruelty-free products.  Hooray!  However, as you may have read (see my earlier post on cosmetics labeling issues) "cruelty-free" is not as all-inclusive as it seems.  Another concern plagues the cruelty-free beauty lover: hidden animal by-products.  Although listed in the ingredients, most of us don't know exactly what we're looking at.  We can't pronounce it, we've never heard of it, we don't know where it comes from - it seems quite daunting, then, to weed out what we don't want to put on our shopping lists.

This list is far from exhaustive, but should help get you familiar with common ingredients you may be staring down the next time you're reading your labels.  Oh, and speaking of labels, "naturally sourced" is another term you should become familiar with.  As with many other phrases that lack any legally enforced definition, be advised that "naturally sourced" ingredients does not mean plant derived or plant based. 

Carmine

What it is:  In a nut-shell, ground up insect bodies.  Carmine creates a red coloring and is used as a dye.  To create carmine, insect bodies are ground up and boiled to extract the carminic acid and various further chemical processes create color variations.

How to spot it:  Look for ingredients that read "crimson lake," "cochineal," or "natural red 4."

How to avoid it:  Back in 2006, the FDA considered requiring products that contained carmine to call it just that: carmine.  They were also considering requiring manufacturers to list that the product was insect-based.  Needless to say, that did not go over well and the FDA ultimately bailed on the potential requirement.  However, if you see "cochineal extract" or "carmine" listed, consider this code for insect-based.

Shellac

What it is:  More bugs!  It is actually an excretion of the female laccifer lacer bug and comes in various colors.  It is used in cosmetics and hair products to provide shine, such as in hair spray or nail polish.  If you're concerned about the environmental impact, The Vegetarian Resource Group estimates that 300,000 lac bugs are killed in the production of just 2.2 pounds worth of lac resin. 

How to spot it:  Look for additive number "E904," "resinous glaze," and "confectioner's glaze" (in food).

How to avoid it:  The ingredient "Zein" is a corn based alternative to shellac.  If you find shiny products like lipsticks, glosses, etc., check to see if the product is vegan (no animal by-product use) or see if the shine is derived from another source, such as "Zein."

Lanolin

What it is:  The word "lanolin" is actually from the Latin word "lāna" which means "wool" - "oleum" means "oily birth."  Put that all together and you get an oily substance secreted by the oil glands of sheep.  Although sheep are not usually killed to obtain the product, improper shearing of sheep has been the cause of death, disfigurement, pain and trauma in these animals.

How to spot it:  Lanolin is often listed as is: lanolin or lanolin oil.  However, look for "lanosterols," "triterpene," "lanogene," or "laneth."

How to avoid it:  Any time you see "sterols" listed, be wary of lanolin.  If the ingredients state "plant sterols" it is a good indication that the oily substance is coming from plants.  Since lanolin is generally used as an emollient, look for plant based oils like coconut oil and olive oil instead.

Guanine

What it is:  Used to create a shimmery effect, guanine is extracted from fish scales and is most commonly found in nail polish.  It's also used in eye shadows and skin care creams and serums. 

How to spot it:  Guanine, like lanolin, is labeled as is.  You may also see "hypoxanthine" or "2-aminohypoxanthine."

How to avoid it:  "Mica" is a common mineral used to create that glittery effect we all know and love.  "Bismuth" and "sericite" are other alternatives to look for when you see something shiny.  If you have a sensitivity to mica, seek out "titanium dioxide" or "zinc oxide" which are common substitutes.  Mica treated with "methicone" is another great way to avoid mica sensitivity AND guanine - win, win.

Apitoxin

What it is:  Ever been stung by a bee?  Then you have experienced the irritation and inflammation associated with apitoxin, or bee venom.  It is believed that apitoxin increases blood flow and creates a plumping effect, so it is used in various skin care products and lip balms/glosses designed to plump lips/skin.  The biggest concern for cruelty-free beauty lovers is that, once a bee stings, it dies.  Recent findings suggest that bees are already in serious trouble as their numbers decline from pesticide usage and declining habitats. 

How to spot it:  If it is apitoxin you're looking to avoid, watch out for "melittin," "apamin," and "adolapin."

How to avoid it:  Fortunately (or perhaps unfortunately, depending on how you look at it) the makers of "bee venom" cosmetics and products are proudly touting the ingredient.  Alternatives are easy to find, mostly herbs and spices that produce that tingly heat sensation: peppermint, cinnamon and menthol are all readily available.

Monday, June 16, 2014

Review: Eslor Soothing Refiner & Cleanser


When it comes to facial cleansers, I might as well be Goldilocks: I can never find the cleanser that is "just right."  I consider my skin combination dry, where my cheeks can stay dry and even flaky, yet I can end up with an oil slick across my forehead.  For me, the perfect cleanser has to remove makeup, suck up the oil so I FEEL the clean, but prevent the tightness and dryness you can often get when you rinse.  Some cleansers left my skin feeling greasy, others left my skin dry and visibly tight. 

Once upon a time, there was Eslor skin care.  Created by a pharmacologist for his wife who, like me, was seeking a natural skin care line, Eslor offers aloe based products for various skin needs.  If you've checked the labels on your cleanser, you'll probably find a plethora of ingredients.  However, Eslor is being praised for what is NOT in it.  Instead of harsh cleansers like sodium lauryl sulfate, there is almond meal, earth kaolin and seaweed extract which help suck up dirt while leaving skin moisturized.  Eslor's Soothing Refiner and Cleanser draws out impurities while cleaning surface dirt away.  Aloe soothes red, irritated skin while glycerin and hops are natural moisturizers.  With only a handful of ingredients, this cleanser proves less is more.

The Pros:

Finally! I've discovered the perfect balance; my face feels clean yet very soft.  Even without immediately applying a moisturizer, this low foaming gel is a combination cleanser and toner in one step.  I've noticed my skin is smoother after about a week of use, too. There's no fragrance or dyes, so this could be an excellent option for sensitive skin.  In addition, there are no harsh cleansers, no parabens, no sodium lauryl sulfate and no sodium lauryl ethel sulfate (both rough cleansing agents.)  This is the first cleanser I have found that has actually improved my skin without any additional product use!


The Cons:

At $32 for a 2 ounce bottle, it isn't a budget-friendly option for some.  It cleans well, but may not offer enough oil control throughout the day for individuals with particularly oily skin.  Finally, because this cleanser is designed to draw out dirt and oil deep within your pores, you may notice a pimple or two in your first week or so of use.  (This is common with face masks and products with kaolin clay, which is a natural detoxifying agent that may bring impurities to the surface.)

This truly is a high quality cleanser and I can only imagine how effective it would be combined with Eslor's other skin care products.  You can receive free samples with purchase on the Eslor website and as a bonus, there are men's skin care products as well.  It's worth a look.