Showing posts with label beauty education. Show all posts

Tuesday, August 12, 2014

FYI: Indie Nail Polish Decoded!

It bears repeating: I love indie brands.  What is an indie brand?  Quite simply an independent brand most people associate with small businesses.  It may be a one-person shop or a rather large sized operation, but they all offer unique and fun products that you won't find at your local drug store or supermarket.  Indie nail polish is a vast market where creativity knows no bounds and there is glitter galore in colors and shapes you never knew existed.  But sometimes it seems like those indie polish gals are speaking a totally different language.  So, what's it all about and what are you getting into?  Here are a few "translations" that may help you as you begin, or expand, your journey.

Common Terminology:

Jelly - This is a description of the consistency of the nail polish.  A jelly polish is, well, like jelly you spread on toast!  It is glassy and generally somewhat sheer; it takes several coats to get opaque coverage.  It is a great vehicle for floating tons of creatively shaped glitter.
 
Crelly - Pictured above, a combination of the terms "cream" and "jelly" = "crelly." It relates to the consistency of the polish.  Like a jelly polish, it is not entirely opaque and, in addition, is creamy or cloudy.  Crelly polishes can be glossy or matte but are all milky.

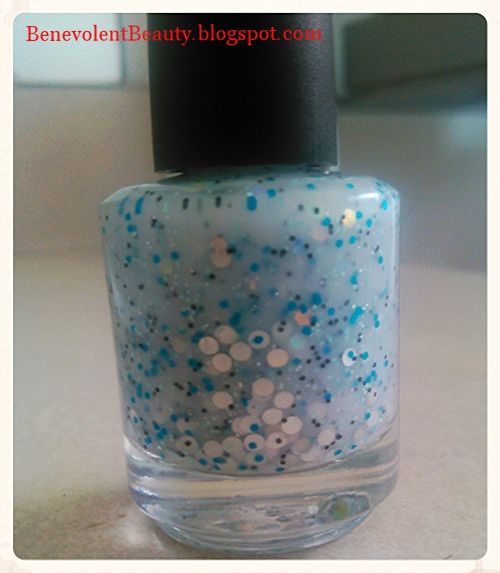
Holo - Short for "holographic," these polishes shimmer and shine like no other.  No thick or chunky glitters here, it's more of an overall sheen that shifts color in varying lighting.

Undies - Just a cute way of referring to a base coat (you know, the clear polish you may or may not put down first before your color of choice).

3-Free - There are potentially harmful chemicals in nail polish, a topic of debate that recently caused even big name brands to change their formulas.  3-free nail polish is formulated without Dibutyl Phthalate (DBP), formaldehyde, and toluene. 

5-Free - Taking it a step further, 5-free nail polish nixes all the above, but also excludes camphor and formaldehyde resin.  Many 5-free polishes boast vegan and even pregnancy-safe formulas (be sure to check all labeling to be sure as these are not requirements, just nice bonuses).

Why Indie Nail Polish:

There are so many benefits to most any indie brands.  You're supporting small businesses and most all indie companies offer cruelty-free nail polish; many are vegan.  Because these small companies are all about the creativity of the maker, there are countless colors and styles of polish that are completely unique; everyone will be asking, "where did you get that nail polish?" These guys don't have the overhead of major brands either, so sales are abundant.  If a new collection is coming out or the maker wants to clear out some discontinued shades, you can save more than 50% off regular prices, which are already lower than store brands.  Ever wanted to design your very own nail polish?  Indie brands will often do custom orders!  That's right, you tell them exactly what you are looking for and they will design a nail polish for you.  Imagine what great gifts custom polishes would make, the possibilities are endless.

Where to Start:

If I've talked you into giving indie nail polish a shot, here are a few brands you must try!

Candied Apple Polish - 5-free polishes and tons of crellys!  This shop is particularly fun because the owner/maker of the polishes offers "Mystery Apples" - a surprise color you get to see when it gets to your mailbox.    

Rain City Lacquer - 3-free polishes for the pastel lover in you.  They ship internationally.

ella + mila - 5-free polishes in a wide range of shades if you're not big on glitter. There is a color for everyone here from brights to neutrals and they offer a "mommy and me" line with coordinating mother/daughter polishes.  Great for gifting.

CDB Lacquer - This is one of those shops that will do custom colors.  They offer polishes in three different sized bottles so you can choose just to sample, or go all out with a full size product. Some formulas are 3-free, others are 5-free.

drip drop nail paint - Often found teaming up with Candied Apple Polish for their popular duo collections, these 3-free polishes ship to the U.S. and Canada.  Drip drop also offers "prototype grab bags" where you can try a mystery assortment of one-of-a-kind polishes.

Friday, June 27, 2014

Tutorial: Self-Tanning Fixes 101

Summer is here and I don't have to tell you how important a golden glow can be to your look.  It's slimming, it evens out your skin tone and blurs imperfections, and it makes you look healthy.  Chances are you've already tried self tanning at home, but perhaps your results weren't ideal.  With a few quick fixes to common self tanning woes, you'll get the perfect shade of bronze without the hassle.

Step 1:  Choose the Right Formula 

Whether it is spray or foam, cream or gel, there are many choices on the market.  The best tip for choosing the right one for you?  Don't be cheap.  It's understandable, some of us do beauty on a budget, but a good self tanner will last you for months and is generally the easiest to use.  The formulas are built to reduce streakiness and help you avoid looking orange.  My favorite self tanner is Tarte's Brazilliance (pictured at top).  It is a gel/cream hybrid that is tinted to show you where it's going as it's applied.  The application mitt is particularly helpful: one, you avoid orange palms and stained nails and two, it cuts streaky application down considerably.  This formula also has a beachy coconut fragrance; while that self tanning smell isn't completely gone, it's certainly less noticeable.  

Step 2:  Apply at the Right Time

Some of us apply self tanner and attempt to go about our day:  No.  Stop.  Desist.  Throughout the day you're sweating, producing oil, rubbing against your clothing and other people.  Even though it might seem like your tanner is dry, most formulas are working for hours after they are applied.  To avoid finding splotches or uneven spots, apply your self tanner at night right before you turn in for the night.  We all tend to sweat less when we sleep, and pajamas tend to be less binding than other clothing.  It gives your skin the best opportunity to process with little to no movement going on.

Step 3:  Blend Trouble Spots

Before you apply your self tanner, consider applying a tiny dab of regular lotion to your knees and elbows.  Massage into the skin completely, then apply your tanner.  The lotion will prevent the dry skin on your elbows and knees from turning orange or darker than the rest of your skin.  After you wash your hands post-tanner application, use your damp fingertips to massage around your wrists and along the backs of your hands.  Washing your hands may have spread water droplets around the area, which can become splotches once your tan is complete.  Finally, do the same around your ankles, blending with your fingertips down toward your feet.  You don't want ring-around-the-ankle/wrists, right?  Taking an extra minute or two to blend these areas is key.

Step 4:  Make Corrections

Leave your self tanner in tact for however long it takes to process fully (the product packaging will tell you).  Once your tanning time is complete, take a shower.  Don't use a bath puff or abrasive sponge, just your hands or a soft washcloth.  After you've dried off, take a look in the mirror.  If you have any streaks or splotches, chances are they can be repaired.  For very minor streaks or discolorations, exfoliate the darker area with a loofah or other abrasive sponge.  This should even you out.  For more noticeable splotches, dip a cotton ball in nail polish remover and rub until you notice the color starting to become more even.  As a last resort if you've missed a spot, add a tiny bit of tanner to the bare area and blend VERY well.  

Step 5:  Troubleshooting

Are you noticing your skin looks orange?  Splurge on a cosmetic grade formula (read: probably not for sale at your local drug store/supermarket).  You may also be applying too much or too often.  Let's face it, self tanners can only go so far to give you a bit of color.  Like celebrities that have overdone it, you, too, can over apply at home.  Most self tanners should be applied no more than twice a week to maintain color.  Finding clogged pores or pimples cropping up?  Exfoliate between applications.  Self tanner can settle into your pores and cause bumps.  Scrub trouble spots with a sugar scrub: my favorite is the ridiculously accessible and wonderfully priced Tree Hut Shea Sugar Scrubs.  This particular scrub moisturizes without depositing heavy oils on your skin, so you can apply your self tanner directly after use.  Practice makes perfect, so keep at it and soon you'll be a bronzed goddess without ever leaving your bathroom.

Friday, June 20, 2014

FYI: 5 Common Animal By-Products You Didn't Know Were There

So, you're doing your part and checking your companies out to be sure you're buying cruelty-free products.  Hooray!  However, as you may have read (see my earlier post on cosmetics labeling issues) "cruelty-free" is not as all-inclusive as it seems.  Another concern plagues the cruelty-free beauty lover: hidden animal by-products.  Although listed in the ingredients, most of us don't know exactly what we're looking at.  We can't pronounce it, we've never heard of it, we don't know where it comes from - it seems quite daunting, then, to weed out what we don't want to put on our shopping lists.

This list is far from exhaustive, but should help get you familiar with common ingredients you may be staring down the next time you're reading your labels.  Oh, and speaking of labels, "naturally sourced" is another term you should become familiar with.  As with many other phrases that lack any legally enforced definition, be advised that "naturally sourced" ingredients does not mean plant derived or plant based. 

Carmine

What it is:  In a nut-shell, ground up insect bodies.  Carmine creates a red coloring and is used as a dye.  To create carmine, insect bodies are ground up and boiled to extract the carminic acid and various further chemical processes create color variations.

How to spot it:  Look for ingredients that read "crimson lake," "cochineal," or "natural red 4."

How to avoid it:  Back in 2006, the FDA considered requiring products that contained carmine to call it just that: carmine.  They were also considering requiring manufacturers to list that the product was insect-based.  Needless to say, that did not go over well and the FDA ultimately bailed on the potential requirement.  However, if you see "cochineal extract" or "carmine" listed, consider this code for insect-based.

Shellac

What it is:  More bugs!  It is actually an excretion of the female laccifer lacer bug and comes in various colors.  It is used in cosmetics and hair products to provide shine, such as in hair spray or nail polish.  If you're concerned about the environmental impact, The Vegetarian Resource Group estimates that 300,000 lac bugs are killed in the production of just 2.2 pounds worth of lac resin. 

How to spot it:  Look for additive number "E904," "resinous glaze," and "confectioner's glaze" (in food).

How to avoid it:  The ingredient "Zein" is a corn based alternative to shellac.  If you find shiny products like lipsticks, glosses, etc., check to see if the product is vegan (no animal by-product use) or see if the shine is derived from another source, such as "Zein."

Lanolin

What it is:  The word "lanolin" is actually from the Latin word "lāna" which means "wool" - "oleum" means "oily birth."  Put that all together and you get an oily substance secreted by the oil glands of sheep.  Although sheep are not usually killed to obtain the product, improper shearing of sheep has been the cause of death, disfigurement, pain and trauma in these animals.

How to spot it:  Lanolin is often listed as is: lanolin or lanolin oil.  However, look for "lanosterols," "triterpene," "lanogene," or "laneth."

How to avoid it:  Any time you see "sterols" listed, be wary of lanolin.  If the ingredients state "plant sterols" it is a good indication that the oily substance is coming from plants.  Since lanolin is generally used as an emollient, look for plant based oils like coconut oil and olive oil instead.

Guanine

What it is:  Used to create a shimmery effect, guanine is extracted from fish scales and is most commonly found in nail polish.  It's also used in eye shadows and skin care creams and serums. 

How to spot it:  Guanine, like lanolin, is labeled as is.  You may also see "hypoxanthine" or "2-aminohypoxanthine."

How to avoid it:  "Mica" is a common mineral used to create that glittery effect we all know and love.  "Bismuth" and "sericite" are other alternatives to look for when you see something shiny.  If you have a sensitivity to mica, seek out "titanium dioxide" or "zinc oxide" which are common substitutes.  Mica treated with "methicone" is another great way to avoid mica sensitivity AND guanine - win, win.

Apitoxin

What it is:  Ever been stung by a bee?  Then you have experienced the irritation and inflammation associated with apitoxin, or bee venom.  It is believed that apitoxin increases blood flow and creates a plumping effect, so it is used in various skin care products and lip balms/glosses designed to plump lips/skin.  The biggest concern for cruelty-free beauty lovers is that, once a bee stings, it dies.  Recent findings suggest that bees are already in serious trouble as their numbers decline from pesticide usage and declining habitats. 

How to spot it:  If it is apitoxin you're looking to avoid, watch out for "melittin," "apamin," and "adolapin."

How to avoid it:  Fortunately (or perhaps unfortunately, depending on how you look at it) the makers of "bee venom" cosmetics and products are proudly touting the ingredient.  Alternatives are easy to find, mostly herbs and spices that produce that tingly heat sensation: peppermint, cinnamon and menthol are all readily available.